Why Docker?(Or why not Anaconda?)
Before starting with Docker, you should know there are some other options to build your machine learning (ML) developing environment such as Anaconda or pyenv. Anaconda is a better choice if you‘re totally new to ML because it’s easier to start with. However, there are some problems bothered me that drove me to switch to Docker:
- Anaconda didn’t have any China mirror site. Installing new package could be painful because of the download speed.
- Although Anaconda is theoretically functional of sharing environment to others, practically it’s quite difficult to do that.
- Anaconda could take a lot of disk space if you’re using multiple virtual environments, even if they’re just slightly different.
With Docker, all these problems solved. Docker have multiple China mirror sites. It’s easy to share environment through Dockerhub or with a Dockerfile. Docker takes much fewer disk space by its layer mechanism.
Using Docker just like Anaconda
Note that the following tutorial might not be the best practice of Docker. But it should be the easiest way to use docker to build your own ML environment and develop ML models. Dockerfile is not required in this tutorial. Before we start, I assume you already install Docker, NVIDIA Docker and VSCode. Make sure platform requirements are satisfied before you install.
Platform Requirements
The list of prerequisites for running NVIDIA Container Toolkit is described below:
- GNU/Linux x86_64 with kernel version > 3.10
- Docker >= 19.03 (recommended, but some distributions may include older versions of Docker. The minimum supported version is 1.12)
- NVIDIA GPU with Architecture >= Kepler (or compute capability 3.0)
- NVIDIA Linux drivers >= 418.81.07 (Note that older driver releases or branches are unsupported.)
Run this simple test to verify NVIDIA Docker is correctly installed.
$ sudo docker run --rm --gpus all nvidia/cuda:11.0-base nvidia-smi
This should result in a console output shown below:
+-----------------------------------------------------------------------------+
| NVIDIA-SMI 450.51.06    Driver Version: 450.51.06    CUDA Version: 11.0     |
|-------------------------------+----------------------+----------------------+
| GPU  Name        Persistence-M| Bus-Id        Disp.A | Volatile Uncorr. ECC |
| Fan  Temp  Perf  Pwr:Usage/Cap|         Memory-Usage | GPU-Util  Compute M. |
|                               |                      |               MIG M. |
|===============================+======================+======================|
|   0  Tesla T4            On   | 00000000:00:1E.0 Off |                    0 |
| N/A   34C    P8     9W /  70W |      0MiB / 15109MiB |      0%      Default |
|                               |                      |                  N/A |
+-------------------------------+----------------------+----------------------+

+-----------------------------------------------------------------------------+
| Processes:                                                                  |
|  GPU   GI   CI        PID   Type   Process name                  GPU Memory |
|        ID   ID                                                   Usage      |
|=============================================================================|
|  No running processes found                                                 |
+-----------------------------------------------------------------------------+
Some terminology should be clarified. Image is like an Object or Class in Python, Container is an instance of Image. We don’t use Image directly. When we use the Docker run <image> command, we specify a container, every change we make is made on the container.
Let’s start now.
Step 1: Pull an Image
Choose a base image to start with, use the following command to download the image.
$ docker pull <image>:<tag>
There are many choices on Dockerhub. You can download a basic linux image with CUDA and CUDNN installed, such as nvidia/cuda, and install your own python packages. Official deep learning images such as pytorch/pytorch and tensorflow/tensorflow are also provided. It’s also a good idea to start with a Jupyter Notebook Image such as jupyter/scipy-notebook or jupyter/tensorflow-notebook.
Here, I would like to start from the base.
$ docker pull nvidia/cuda:11.1.1-cudnn8-devel-ubuntu18.04
Note that docker pull is not necessary since docker run will pull images from remote repositories if the image doesn’t exist on local machine.
Step 2: Run a Container
Interactively
Usage
$ docker run --name <container name> -it <Image>:<tag> <command>
Example
$ docker run --name cuda-container -it nvidia/cuda:11.1.1-cudnn8-devel-ubuntu18.04 /bin/bash
--namespecify the container’s name, docker will assign random name to the container if it’s not specified--interactive,-ikeep STDIN open even if not attached--tty,-tallocate a pseudo-TTY/bin/bashafter<Image>:<tag>is the first command executed, I use/bin/bashhere to specify which shell I want to use in the pseudo-TTY.
Run in Background and Expose a port to Use Jupyter Notebook
Let’s expose 8888 port for Jupyter Notebook.
$ docker run -p 8888:8888 -it nvidia/cuda:11.1.1-cudnn8-devel-ubuntu18.04
-
--detach,-drun container in background and print container ID -
--publish,-ppublish a container’s port(s) to the host
Install python3 and jupyter lab inside pseudo-TTY
$ apt-get update \
&& apt-get install -y python3 python3-pip \
&& pip3 install jupyterlab
Run Jupyter Lab
$ jupyter lab --port 8888 --ip 0.0.0.0 --allow-root
--ip 0.0.0.0is used to solve this issue--allow-rootis used because we are root user in docker
Now you can access Jupyter Lab on your browser through port 8888. Remember to forward your port if you‘re using Docker on a remote server.
Where do I put my data and outputs?
Data is not recommended to store inside container because once container is removed data will be removed together. Docker use Volume to mount directory on the host to container. See more details on Docker Docs: Volumes.
Usage
-v <host_path>:<container_path>
--volume,-vBind mount a volume
Example
Let’s create an example data directory
$ mkdir data_example && echo 'hello' > data_example/data1
Now mount ~/data_example to /data on the container
$ docker run -v ~/data_example/:/data -it nvidia/cuda:11.1.1-cudnn8-devel-ubuntu18.04
Check /data on the pseudo-TTY and you should see hello printed on the terminal
$ cat /data/data1
Now write new data to /data and exit the container
$ echo 'world' > /data/data2 && exit
Check whether the new data was written on local directory and you should see world printed on the terminal.
$ cat ~/data_example/data2
What if I exit the container accidentally?
Do I need to keep my docker container running? The answer is NO!
First use the following commend to check any exited container
$ docker container ls -a
- without
-aonly running containers will be shown
You will see something like this
CONTAINER ID   IMAGE                                              COMMAND   CREATED             STATUS
       PORTS     NAMES
474a90545899     nvidia/cuda:11.1.1-cudnn8-devel-ubuntu18.04      "bash"    15 minutes ago      Exited (0) 15 minutes ago                suspicious_jemison
Use CONTAINER ID to specify the container you want to start by
$ docker start -i 474a90545899
--interactive,-iattach container’s STDIN
Open Multiple Terminals in Docker
Now that I have a running Docker Container, can I execute multiple tasks in Docker? Of course! The docker exec will allow you to run a command in a running container. Let’s say I want to open a new terminal of the running container. The command is as simple as
$ docker exec -it <CONTAINER> bash
Step 3: Commit a Container to a New Image
Let’s say we pull a basic nvidia/cuda Image and installed python3 and Jupyter Lab on the container. How can we save these changes so that next time we can just run an Image with all these packages installed? The answer is docker commit
Usage
$ docker commit [OPTIONS] CONTAINER [REPOSITORY[:TAG]]
Example
Similarly we need to use CONTAINER ID to specify the container
$ docker commit 474a90545899 yuanpinz/mymlenv:python3-jupyterlab
474a90545899is myCONTAINER ID
Now use docker image ls command to check if the new image was built
REPOSITORY              TAG                                     IMAGE ID       CREATED         SIZE
yuanpinz/mymlenv        python3-jupyterlab                      d0666881ff25   6 seconds ago   9.76GB
nvidia/cuda             11.1.1-cudnn8-devel-ubuntu18.04         3e0ba3c9a1db   5 weeks ago     9.35GB
Step 4: What if I Want to Expose/Publish New Ports or Attach Volumes to an Existing Container?
In the previous examples, we exposed/published ports and attached volumes by using docker run command with -p and -v parameters. What if I want to do these to an existing container instead of planning what ports to be exposed/published and which volume to be attached at the very beginning? The answer is simple but not beautiful. You CAN’T expose/publish ports or attach volumes other than using docker run command. However, you can always commit an existing container to image and use the docker run command again.
For example, we published port 8888 for jupyter lab previously.
$ docker run -p 8888:8888 -it nvidia/cuda:11.1.1-cudnn8-devel-ubuntu18.04
Let’s say the CONTAINER ID of this container is 474a90545899.
We commit this container to a new Image,
$ docker commit 474a90545899 yuanpinz/cuda:port8888
Now we can publish a new port 6006 for potential use of tensorboard by
$ docker run -p 6006:6006 -it yuanpinz/cuda:port8888
Step 5: Push Your Image to Dockerhub
You can use Dockerhub just like Github to share or synchronize your Image on the cloud. Note that only one private repository is allowed for the free plan. The Docker Hub Quickstart will help you publish your own Image on Dockerhub.
Example
Firstly, login your Docker Hub account.
$ docker login
Secondly, push your Image to Docker Hub
$ docker push yuanpinz/cuda:port8888
Now that your Image is uploaded to Docker Hub, you can pull your Image on any other machine
$ docker pull yuanpinz/cuda:port8888
Step 6: Use VSCode to Edit Files Inside Containers
Check this official post by vscode about Working with containers, if your docker is installed on remote server, read this post Connect to remote Docker over SSH too.
To be simple, all you need to do is to install the Docker extension for VSCode. If you’re using docker on a remote server, make sure the extension is also installed on the server. To do this, you need to connect to your server through SSH on VSCode and install the extension through Marketplace.
Example
Step 1. Since I installed Docker on the remote server, I connected to my server through SSH in vscode and installed the Docker extension (You may need to restart vscode after the installation). If your Docker is installed on your local machine, skip the SSH step and installed the extension locally. Open a workspace. (I don’t know why but this is important, otherwise you will get the “There are no running containers to attach to” error when you try to attach to a Container later). Now you can check your Containers and Images through vscode.
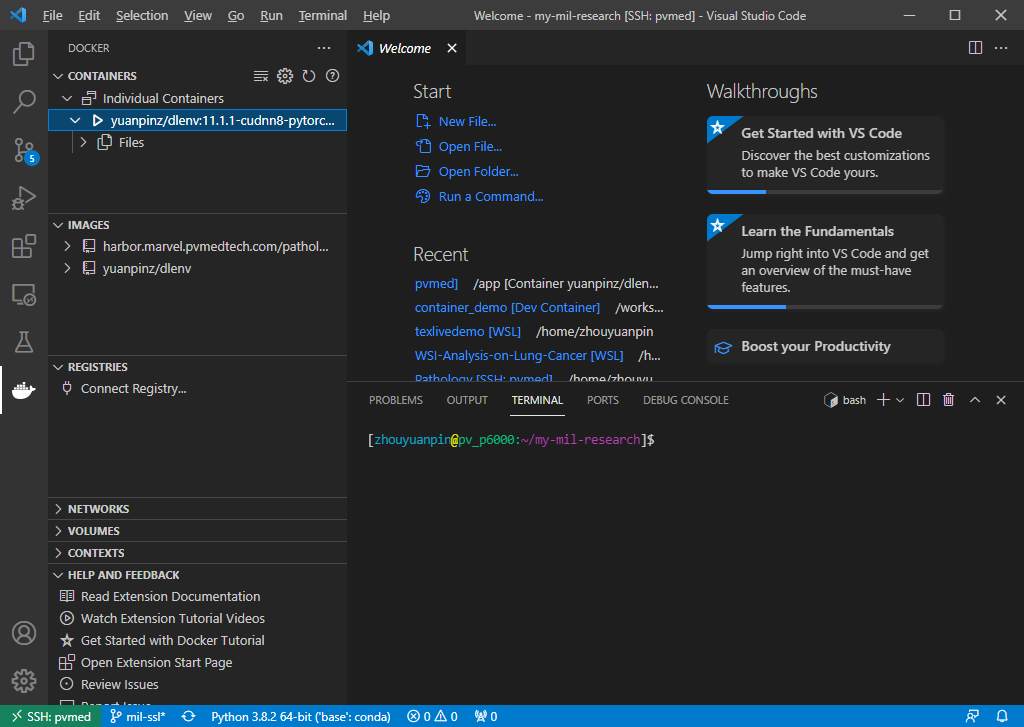
Step 2. Run a Container in the background through command line.
$ docker run -t -d yuanpinz/dlenv:11.1.1-cudnn8-pytorch1.9.0-pyg2.0.0-devkit
-t is necessary otherwise the container will stop immediately.
Note that if you use “Run” or “Run interactive” in the Docker extension. It will run the Container with --rm tag which remove the Container once it exit.
Step 3. Attach VSCode to the Container.
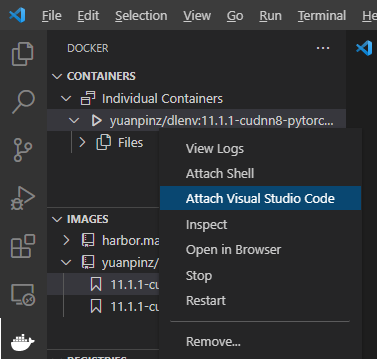
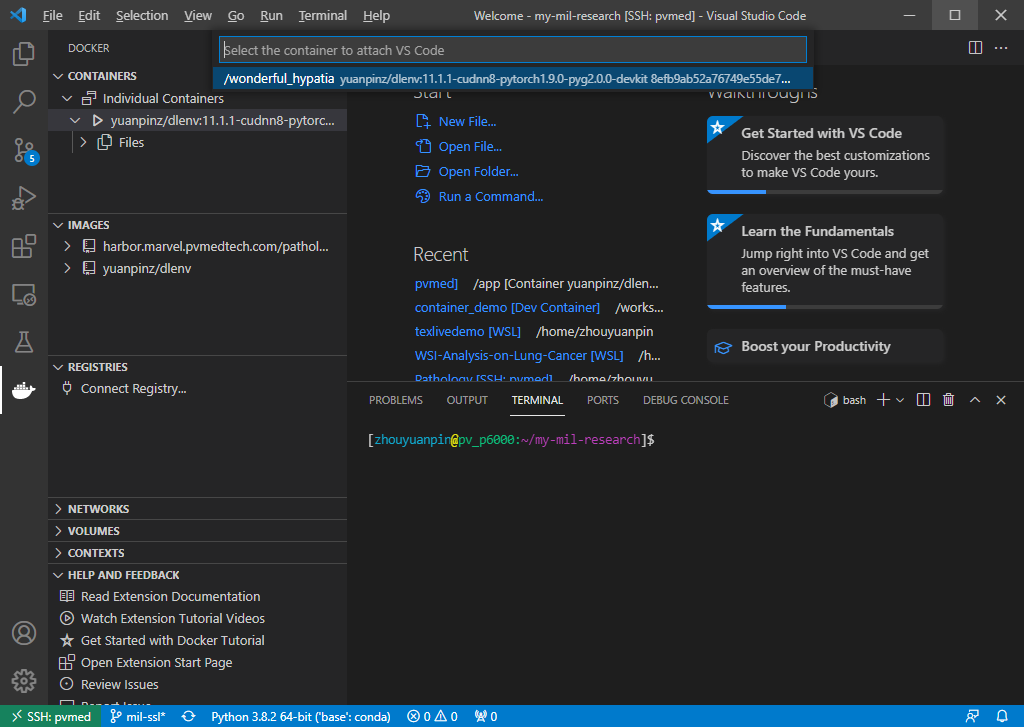
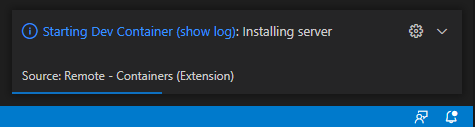
VSCode will install its server inside the container automatically.
Install Python and Pylance extension for programming with Python if it’s not installed automatically. Reload might be required.

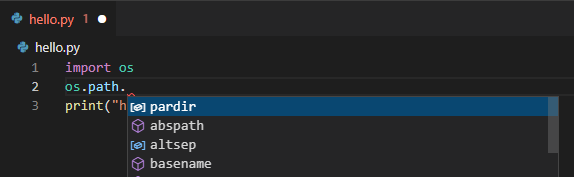
Step 4. Now everything is ready. VSCode workspace is set to be your WORKDIR in the Container. Let’s write a “hello world” script. Autocomplete is enabled in VSCode.
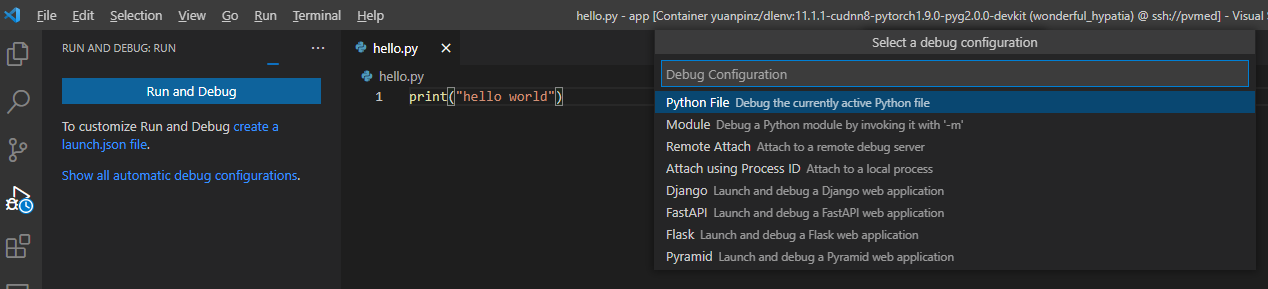
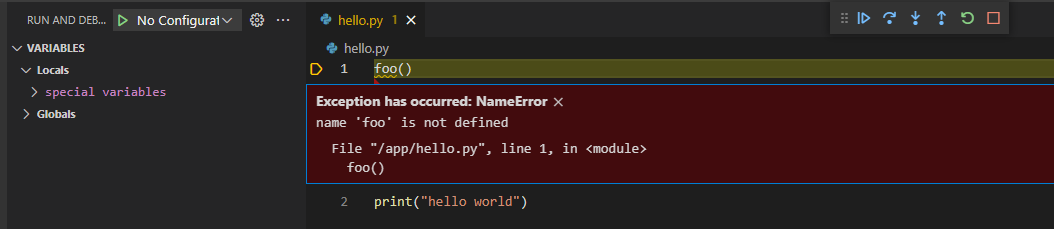
Run and Debug works just like local machine.
A Simple Dockerfile Template For Data Scientist
FROM <basic Image>
RUN <install command to install any packages>
COPY <path in the host> <path in the container>
WORKDIR <workdir>